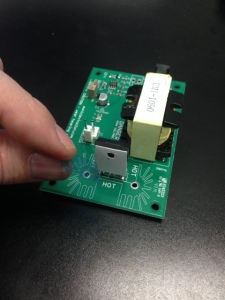
How to assemble your Sonic Levitation Machine
Step 1

Press fit the base plate onto the bottom of the transducer. A rubber hammer or light press against a hard surface might be required. If the transducer is loose, use some silicone glue to hold it in place.
Keep in mind that the one hole in the black plastic base is only threaded partly thru on one side. Make sure the threads start on the top side of the base and not on the bottom. You will know it if you put it in backwards in step 2 if the support rod will not install.
Step 2
Step 3

Insert the nuts into red thumb screws and install reflector as shown. Be sure to remove the blue protective film on each side of the reflector.
Step 4

Remove the protective film from one side of the thermal tape, apply it to the back side of the FET and remove the other side of the protective film. Cut a small hole in the tape for the screw.
Step 5

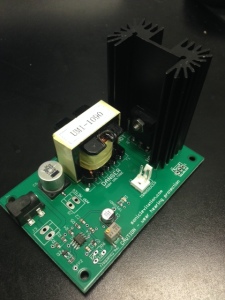
Attach the heat sink to the PCB and snug up the crew. Do not over tighten or you could damage the FET.
Step 6
When you plug the Ultrasonic Levitation Machine into a 120/240VAC (USA/Europe/Worldwide) outlet, you will hear a annoying high pitched noise. That is the ultrasonic energy being emitted from the transducer. Be careful not to leave the unit running too long before you plan on levitation objects. The heatsink will begin to heat up so there is no reason to run it unless you are planning on using the device. For long term use such as public demonstrations, a standard 12volt cooling fan connector can be found on the circuit board for added cooling.
In case you want to modify or learn more about how this device works, here are the Eagle Files and schematic.
Tuning the Sonic Levitation Machine
This can be the hard and frustrating part when you first set up your Sonic Levitation Machine. Once you get it to work a few times, I promise you that setup is easy.
For best results, you can add an AMP meter to the circuit. There is a spot on the board and just be sure to cut the traces and put the current meter in series with the power source. Tuning is easy with a current meter. Just turn the trimpot so that the output is around 3 AMPs. No more than 3 1/2 amps is needed or you could overheat the driver board.
If you do not have an AMP meter, setup is more of a trial and error process.
Place a small foam ball on the surface of the transducer as shown in the video and turn the trimpot until the ball seems to glide over the surface. The trimpot will be tuned somewhere in the center of the 10 turns. Make sure you back off the trimpot 1/4 to 1/2 turns so you don’t overdrive and create too much heat. You do not need the driver board tuned perfectly, you just need enough power to make the ball glide over the surface of the transducer.
When you get the circuit tuned and running cool (3 1/2 amps max), there is no need to adjust it ever again.
Once you have the circuit tuned correctly, you need to adjust the distance between the reflector and transducer to create an anti gravity area in the airspace above. The sound waves will capture and levitate the foam ball once this adjustment is complete. Start by leaving the foam ball on the surface of the transducer and adjust the reflector distance with the two red thumbscrews. Once you hit the “sweet spot” the foam ball will begin levitation slightly above the transducer as shown in the video below.
DANGER – DANGER – DANGER
There are two important facts to remember. This circuit uses high voltage (120V) to drive the ultrasonic transducer. Be careful not to touch the wires on the transducers when it is turned on.
A word about overheating
The Ultrasonic Levitation Machine’s circuit is capable of delivering far more power than needed to drive the transducer. Be careful not to run the boards at more than 3 AMPs. That is all that is needed to levitate a foam ball. The transformer and heatsink can get hot so simply back off the trimpot by 10-20 degrees once you hit that correct ‘sweet spot” in oscillation. If you run it too long at full power, the plastic on the transformer can start to melt!
If you notice the board getting too hot, just back off the trimpot a little. Once this setting is adjusted correctly, you will never need to touch it again.
Have Fun!

